
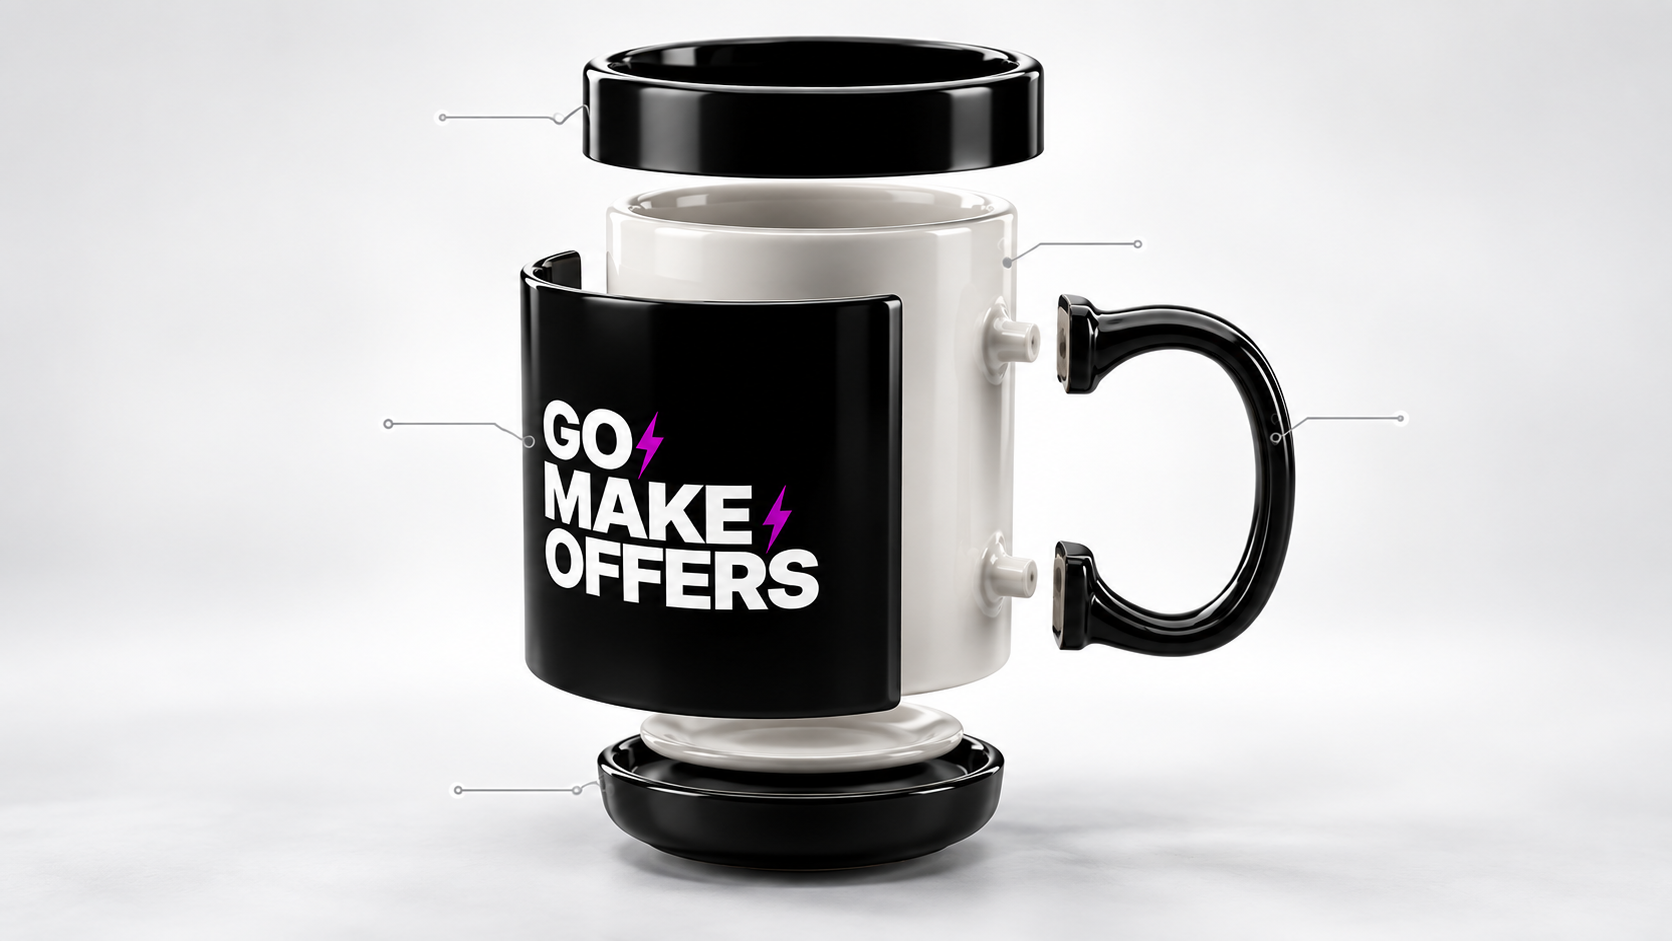
A product photograph usually shows the finished object. An exploded view makes the construction itself the story, revealing the shapes, layers, and material details that are easy to overlook once everything is assembled.
This prompt turns a familiar everyday object into an elegant engineering-inspired campaign. The parts appear to hover in place, but the composition stays orderly and plausible instead of becoming a random cloud of pieces.
Exploded Product Anatomy Prompt
Create a high-end photorealistic exploded-view product campaign featuring [PRODUCT] using the attached reference image. Identity and design: preserve the exact external silhouette, shape language, branding when visible and supplied, original colors, visible hardware, finishes, and distinctive product details. Do not redesign the product. Known or approved parts, in assembly order: [COMPONENT LIST]. If no verified internal component list is available, limit the explosion to clearly visible, known exterior pieces and recognizable physical layers. Do not invent hidden circuitry or claim an exact engineering layout. Separate the approved components smoothly along [VERTICAL / HORIZONTAL / DIAGONAL] assembly axis, with deliberate gaps between each layer. Every component must remain aligned to its true location in the original assembled product, in a consistent perspective, at believable scale. The arrangement should read as one object disassembled in space, NOT several different objects scattered into a pile. Photograph the components in a premium industrial-design studio with [LIGHTING], [BACKGROUND], and [CAMERA ANGLE]. Show realistic materials, precise edges, soft studio shadows, subtle reflections, and convincing fasteners where reference-supported. Keep the hero exploded assembly central with enough negative space to understand each component. Optionally place one small assembled version beside the arrangement for orientation. Style: elegant engineering editorial, premium commercial product photography, highly accurate perspective, believable manufacturing surfaces, restrained color, and clean visual hierarchy. No made-up screws, impossible joints, speculative components presented as fact, floating text, fake annotations, invented specs, duplicate pieces, decorative particles, unrealistic product shape changes, or watermarks. The final image should feel like a beautifully art-directed exploded-view product photograph that preserves the real product’s identity.
What This Prompt Creates
A photorealistic exploded-view product image showing the whole item separated into identifiable components or visually plausible layers. The arranged pieces communicate construction, craftsmanship, and material differences while keeping the object’s design recognizable.
This works well for sneakers, headphones, cameras, mechanical keyboards, backpacks, watches, footwear, and other products with clearly layered forms. For a product with unknown internals, treat the output as a conceptual visualization rather than a technically accurate diagram.
How to Use It
Upload a reference photo of [PRODUCT], identify visible parts or specify an approved component list, and choose the direction of the separation. Ask for consistent perspective, uniform assembly axis, controlled spacing, and the product’s exact original colors and shapes.
If this visual will be used as a factual technical illustration, provide official diagrams or verified component details. Without those, focus on visible shells, panels, cushioning, layers, and known product pieces rather than invented electronics.
Make It Your Own
Sneaker Layers: Separate outsole, midsole, upper, laces, and insole into a vertical stack.
Audio Engineering: Float headphone cushions, outer shells, driver housings, and headband pieces along a central axis.
Camera Breakdown: Present an approved list of lens, mount, chassis, panels, and controls in an orderly sequence.
Materials Story: Focus on three or four known external layers and highlight their differing surfaces without pretending to show exact internals.
Product Comparison: Show a compact fully assembled product beside its exploded counterpart at a consistent scale.
Tips for Better Results
The order of components matters more than the number. Ask for a single readable assembly axis and clear spacing.
Provide real reference photos or diagrams when brand and component accuracy matter. AI-generated internal parts can be visually plausible but physically incorrect.
Do not allow pieces to rotate arbitrarily; matching camera perspective across components makes the parts feel connected.
Avoid fake dimension callouts and invented component names. Add verified labeling later if required.