
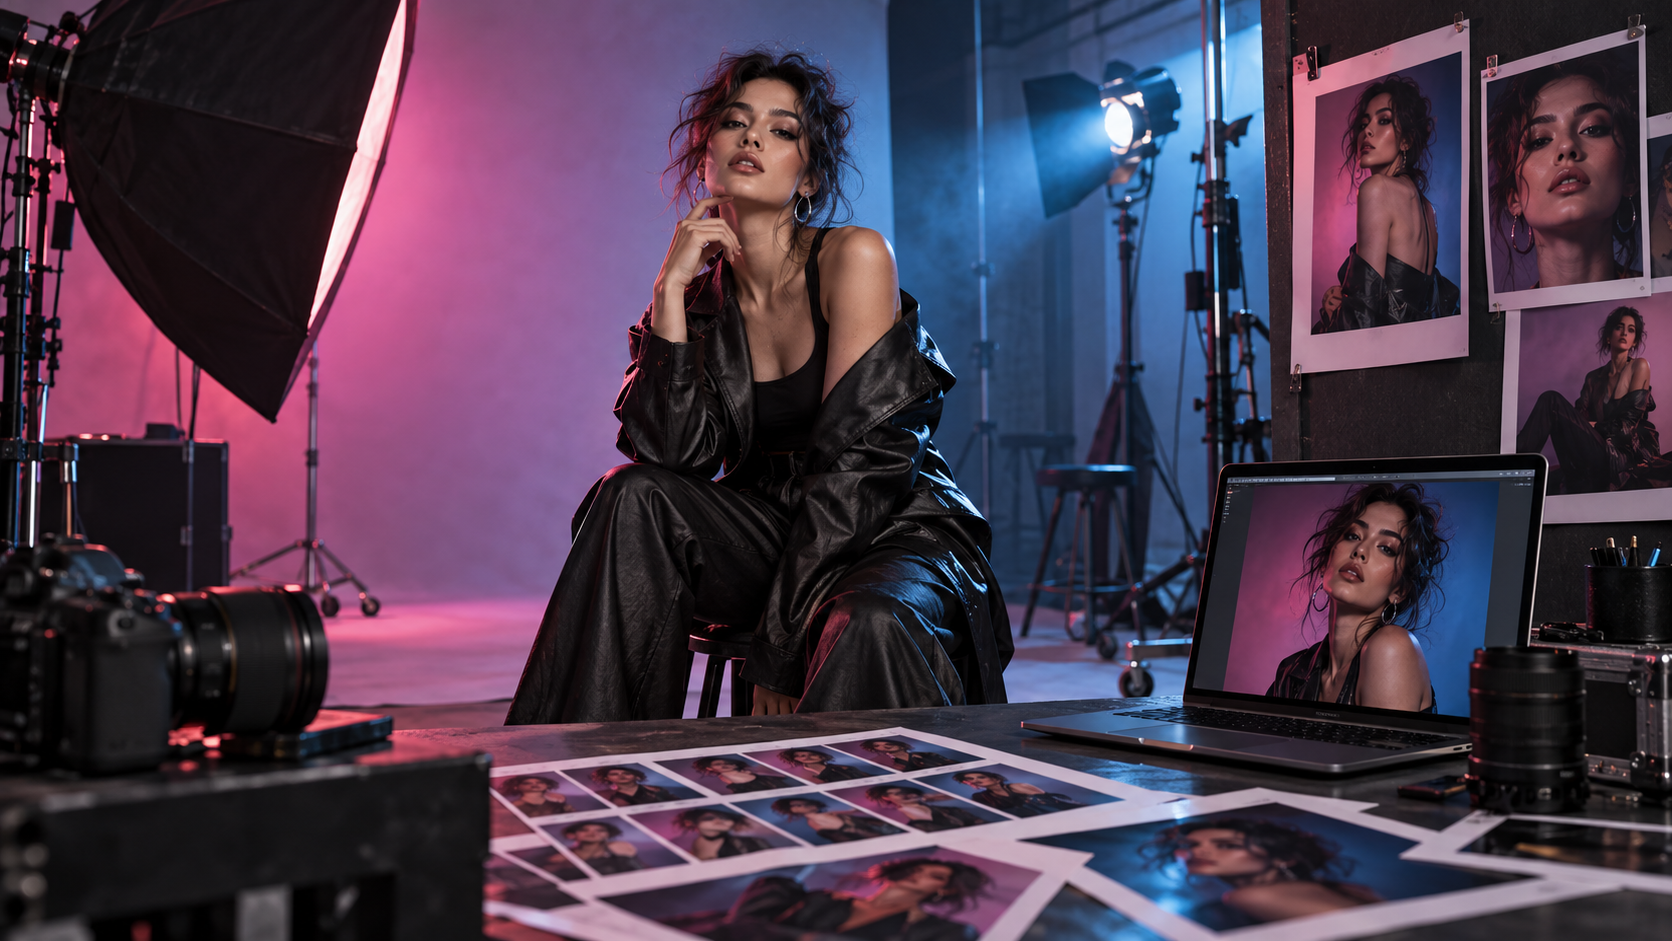
A portrait usually shows you the final frame. But an editorial shoot is bigger than one image: there are test shots, alternate poses, contact sheets, crop decisions, monitors, lighting setups, and all the little choices that happen before the final select.
This prompt brings that process into the photograph itself. Instead of generating only a finished portrait, it creates the feeling of stepping onto a real editorial set while the shoot is still happening.
Editorial Contact Sheet Portrait Prompt
Create a polished editorial portrait that shows both the finished hero image and the creative photoshoot process surrounding it. Subject: [PERSON AND APPEARANCE] Editorial direction: [FASHION / BEAUTY / MUSICIAN / FOUNDER / PERSONAL BRAND / MAGAZINE] Wardrobe: [WARDROBE DESCRIPTION] Studio environment: [STUDIO / SET DESCRIPTION] Lighting: [LIGHTING DIRECTION] Color palette: [COLOR PALETTE] Primary pose: [HERO POSE / EXPRESSION] Alternate takes: [ALTERNATE POSES / EXPRESSIONS / CROPS] Show one real subject as the clear hero of the physical scene. Surround the subject with believable editorial-production details: a professional camera, light stands or softboxes, a monitor or laptop showing an alternate portrait from the same session, printed contact sheets, pinned selects, crop tests, notebooks, or art-direction references. The alternate images must clearly depict the same person, wardrobe, hair, makeup, and lighting setup as the live subject, but with different expressions, poses, or framing. Do not place multiple physical clones of the subject around the studio. Duplicate appearances should exist only as photographs, screen previews, or printed proofs. Make the monitor imagery and printed selects visually readable as photographs without requiring legible software interface text. Photography direction: premium editorial portrait photography, realistic skin texture, natural facial proportions, believable hands, professional studio lighting, controlled depth of field, subtle film grain, refined color grading, and high-end magazine art direction. Composition: wide cinematic editorial frame with the hero subject occupying the strongest visual position. Use foreground camera gear or studio equipment sparingly to create depth without obstructing the face. Use realistic studio behavior: light spill from softboxes, subtle reflections on lenses and monitors, cables where appropriate, contact sheets with believable small portrait thumbnails, and consistent exposure across the live subject and preview images. The finished result should feel like a photographer captured an elegant behind-the-scenes moment during a real editorial session while the team was reviewing the shoot. Avoid generic office environments, random extra people, duplicated physical subjects, fake camera interfaces, unreadable giant software text, excessive equipment clutter, plastic AI skin, warped hands, inconsistent wardrobe between previews, unrelated alternate faces, or floating graphic overlays. High-resolution editorial photography, cinematic studio atmosphere, authentic contact-sheet workflow, premium magazine portraiture, sophisticated creative direction.
What This Prompt Creates
This prompt creates a polished editorial portrait inside a believable behind-the-scenes photoshoot environment.
The hero subject remains the main focus, but the surrounding studio tells a larger visual story through alternate takes on monitors, printed contact sheets, pinned selects, camera gear, light stands, cables, notebooks, and art-direction references.
It works especially well for fashion photography, beauty campaigns, musician portraits, founder and personal-brand shoots, magazine-style editorials, creative-director imagery, campaign moodboards, and social content about the creative process.
Because the surrounding selects can change while the subject and lighting stay consistent, the same setup can also become a repeatable visual series.
How to Use It
Start with [SUBJECT AND APPEARANCE]. Describe the person’s wardrobe, expression, pose, and overall presence without overloading the prompt with unnecessary facial detail.
Next, choose an editorial direction such as high-fashion studio, beauty campaign, musician press shoot, founder portrait, monochrome magazine portrait, or colorful personal-brand session.
Then define what the behind-the-scenes environment should reveal. You can include a large monitor showing another pose, pinned contact sheets, printed selects on a table, camera gear in the foreground, light stands, moodboards, or a photographer partially visible behind the camera.
Finally, keep the visual hierarchy clear. The real subject should remain the hero. Alternate takes should appear only inside monitors, printed photos, or contact sheets so the scene feels like one photoshoot rather than a room full of duplicate people.
Make It Your Own
Fashion Contact Sheet: Build the scene around a high-fashion portrait with a wall of alternate poses, crop tests, and monochrome contact sheets behind the subject.
Beauty Campaign Review: Use clean beauty lighting and place a large calibrated monitor beside the subject showing close-up skin, makeup, and expression variations from the same shoot.
Photographer’s Desk: Shift the emphasis toward the editing table with printed selects, grease-pencil marks, crop notes, lenses, memory cards, and the hero portrait session happening just beyond the desk.
Magazine Cover Session: Create a sophisticated magazine-shoot environment with several potential cover portraits visible on monitors and boards while the subject holds the final editorial pose.
Monochrome Proofing Room: Keep the physical studio warm and cinematic while all alternate portraits appear as black-and-white proofs, creating contrast between the live scene and the reviewed images.
Tips for Better Results
Ask for one main subject in the physical scene. Alternate versions of the subject should exist only as photographs, monitor previews, or printed proofs.
Describe the monitor image separately from the live pose. A different expression or crop makes the contact-sheet concept immediately easier to understand.
Use visible production details with purpose. One camera, one or two lights, a monitor, and a few printed selects usually feel more convincing than filling every square inch with equipment.
Keep the lighting consistent between the live subject and the alternate images. They should feel like frames from the same session, not portraits borrowed from five unrelated shoots.
For a cohesive series, lock the subject, wardrobe, studio palette, lens, and lighting setup while changing the selected pose, contact sheet arrangement, or review stage.